This henna recipe is adjusted from our KISS recipe to take into account the needs of individuals who may be experiencing increased skin sensitivity due to pregnancy, age, or a medical concern.
How to mix a small batch of henna paste for Sensitive Individuals
KISS Recipe, begin mixing 24 hours before you plan to use the henna. It takes about 24 hours to prepare the henna paste for application.
|
|

High Quality Lavender Essential Oil is recommended for the following people:
- Chemo Patients, use only Lavender Essential Oil with a camphor content of less than 3%.
- In pregnancy, recommended application is during the 3rd trimester.
- Breastfeeding women
- Children
- Sensitive Individuals
- Yields approximately 3 ounces henna paste
- Creates approximately 75 small designs
- Fills 3-5 cones depending on their size
|
|

|

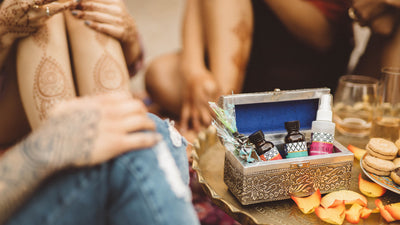
Gather your Supplies
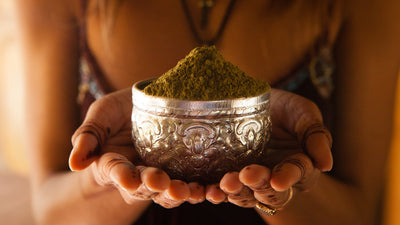
- Quarter Cup Body Art Quality Fresh Henna Powder
- Lemon Juice, Bottled or Fresh, strained
- Sugar, 1.5 teaspoons
- 1 Vial HC Lavender Essential Oil Blend, 1.5 drams/teaspoons
- Small Plastic or Glass Bowl
- Measuring Cup & Spoons
- Chopstick, Spoon, or Spatula for stirring
- Saran Wrap
- Applicator Cones or Bottles
|
|


|

24 hours before you plan to use the henna begin mixing
- In a small glass or plastic bowl mix ingredients
- 1/4 cup Body Art Quality Natural Henna Powder
- Add lemon juice until consistency is like mashed potatoes (start with 1.5 Tablespoons and slowly add more if needed)
- Stir well
|
|


|

Add the rest
- Add 1.5 teaspoons sugar
- Add 1 Vial (1.5 dram/1.5 teaspoons) Henna Caravan Lavender Essential Oil
- Mix thoroughly until all ingredients are fully incorporated and there are no lumps
|
|


|

Mix it Up
- Mix, mix, mix it all up till all ingredients are fully incorporated.
- It'll be thick, that's okay.
|
 |

Wrap it up
- Cover the surface of the henna paste with saran wrap (or a plastic bag) and gently press down so it's touching the surface and there's no air contact
|
|

|

Keep it warm for 24 hours
- Let the covered henna paste rest in a warm location for 24 hours (about 75 degrees Fahrenheit).
- It’s always best if you use a thermometer to monitor temperature. You don’t want to ‘cook’ your henna and ruin it. Digital Candy thermometers work great. Just stick the thermometer right in the bowl of paste.
|
|


|

Check consistency
- When 24 hours has passed, take off the plastic wrap and give it a good stir.
- Adjust your consistency. To thin the paste add 1/4 teaspoon lemon juice at a time until your desired consistency is reached. To thicken the paste add a pinch of henna powder.
- At HC we like a henna paste that 'ribbons' or flows off the spoon. Some like it thinner, some like it thicker.
|
|

|

Fill applicators and go draw!
- Fill your applicator cone or bottles now
- Go draw beautiful designs!
|
| |

- Store leftover paste in the freezer for 6-12 months.
- Defrost at room temperature.
- Only defrost the amount you’ll use that day, multiple freeze and thaws will compromise the stain quality.
|